Many of you are already expert users of MindManager 9 for Mac. You’ve mastered the new filtering feature and you’re deft at creating interactive slides from you map (if you are not familiar with these new features, take a look at the What’s New in MindManager 9 for Mac post).
Here, we’ve supplied some tips to customize MindManager and take your experience to the next level.
Tailoring Your Toolbar to Meet Your Needs
Customizing your toolbar is a great way to increase your personal productivity. Include only your most important and frequently used features and remove the rest for a more streamlined interface.
To customize your toolbar, simply select the View Features in the main menu and select “Customize Toolbar…” at the bottom of the menu (Figure 1).
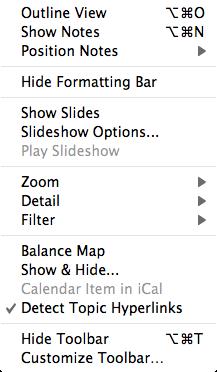
Figure 1: Customize your MindManager toolbar
Now all you do is simply drag-and-drop the icons of your favorite and most frequently used features into your toolbar, or just right click and select “Add” (Figure 2).
![]()
Figure 2: Select the icons and drag-and-drop to your toolbar
Once you’ve added your key features, you can adjust how they appear in your toolbar. You can either display just the icons, just the text, or both…and if you want to fit as many icons as possible, you can select the small size option to shrink each one.
Creating Your Own Markers Groups and Icons
MindManager comes loaded with useful icons and markers already pre-defined and ready for use. But what if you want to create your own marker set? For example, let’s say you’re a project manager and would like to attribute tasks to various departments.
MindManager 9 for Mac allows you to customize the labels for existing marker sets or create your own from scratch! If you prefer to use one of the existing marker sets and just want to rename them, you simply right-click on the text of the marker you want to rename and select the “rename” option in the pop-up menu and edit as you please (figure 3).
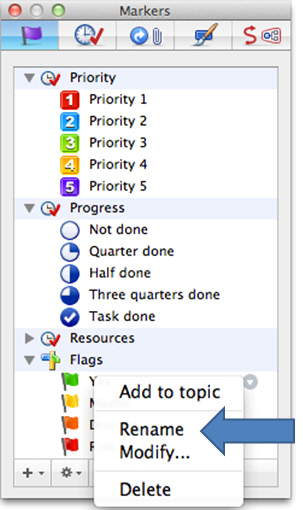
Figure 3: Rename existing marker set
If you prefer to create a custom marker set, all you need to do is select the “+” icon at the bottom of the Markers Inspector and select either New Marker Group or New Tag Group, depending on what type of icons you want to create.
From there you can title your new marker or tag group (Default label is Group Name) and select the icons you want to use either from the icon library (Figure 4) or customize with your own.
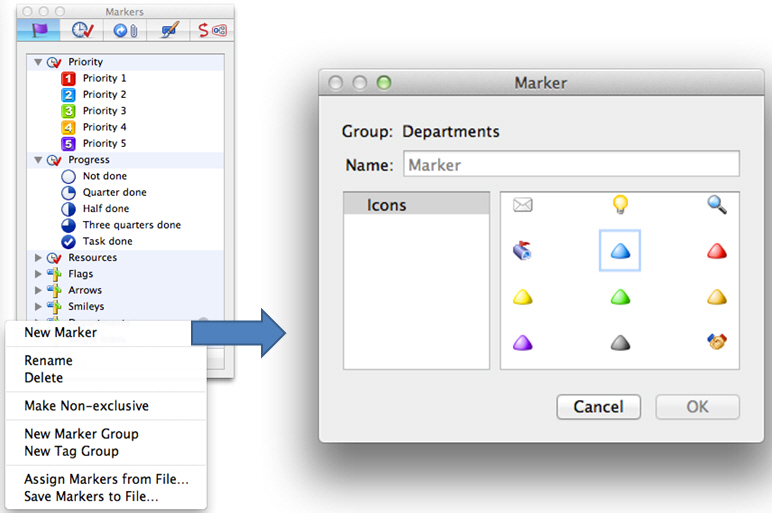
Figure 4: Customize markers and tag groups
Customizing Keyboard Shortcuts
If you ask a power user what the most important functionality is of their favorite application, they’ll likely tell you the keyboard shortcuts. Fortunately, Mac OS X offers the ability to change your keyboard shortcuts so it makes more sense to you and how you like to work with the application.
To customize your keyboard shortcuts, go to the Apple menu and select “System Preferences”, then “Keyboard”, and then “Keyboard Shortcuts” (Figure 5). From there you can select the “+” symbol and choose the application. Now you can customize the shortcut for each menu command.
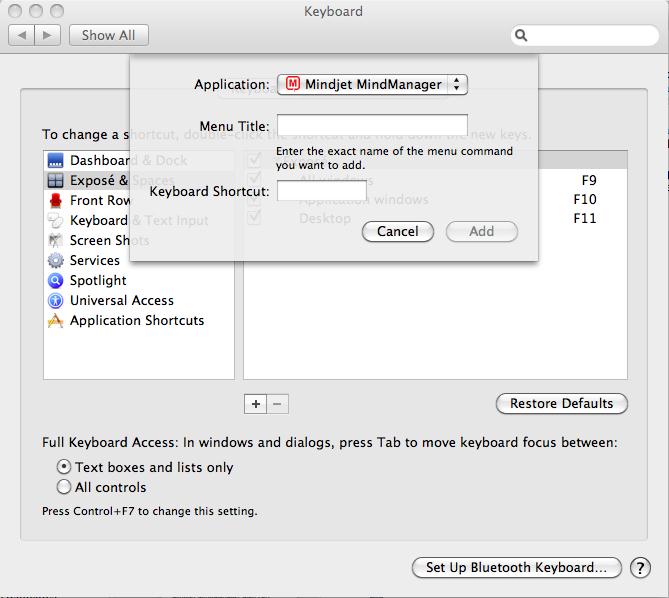
Figure 5: Customize your keyboard shortcuts
NOTE: This is a feature of Mac OS X. This is NOT a MindManager feature; as a result we have not tested for full compatibility.
Creating Your Own Map Templates and Styles
As you know, MindManager for Mac offers a number of out-of-the-box map templates designed to help you start mapping faster and more easily. What you probably didn’t know is that you can also create your own map templates. Once you’ve created your map, you can save it as a number of different file formats including a Mindjet MindManager Map, Map Part, Map Template, and even a Map Style.
If you want to customize the style of your maps (topic shapes, lines, colors, etc.) then you can follow the same process (Figure 6).
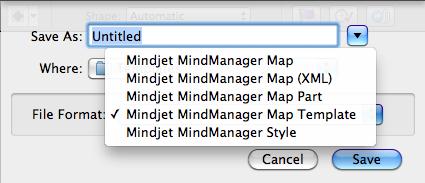
Figure 6: Save as map template or styles
Create a map with the styles of your choice and then save as a Mindjet MindManager Style. And when you save to the default location (?~/Library/Application Support/Mindjet/MindManager/9/{language}/Library/Styles), your map style will automatically be saved to your Style Chooser!
Hopefully these advanced tips will help you make the most of your MindManager experience and take your MindManager skills to the next level.
