Have you ever built one of those maps that grew so big it scared other people away?
A big, scary map might be good for your ego, but it’s not so good for collaboration. So in some cases, the best solution is to break up your mega-map into a few smaller maps.
Using several smaller maps will not only make them easier to read, but also easier to share with specific teams. For example, one part of the mega-map may contain information for your sales team, while another part contains information for the graphic design department. So rather than having those sections in the mega-map, it makes more sense to put them into smaller maps.
With the Send To Linked Map feature in MindManager Version 9 for Windows, you can do just that. Linked Maps make the process of separating a large map into smaller ones fast and easy.
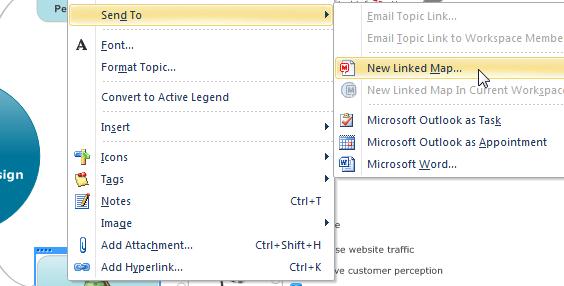
Start by identifying a topic to become the central or a main topic of a new map. Right-click that topic and select Send To > New Linked Map as shown below.
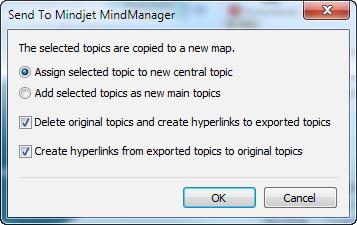
The next dialog box that appears will give you a few options to choose from. Let’s walk through them.
Assign selected topic to new central topic / Add selected topics as new main topics:
In my example, I only chose one topic, so I can either choose to have that topic be the central topic of the new map or a main topic. If I had selected more than one topic, the only option available to me would be to add the selected topics as new main topics.
Delete original topics and create hyperlinks to exported topics:
This will remove the topics you select from your original map. In most cases, you’ll want to keep this selected, since the goal is usually to break up your big map into smaller ones. With this option selected, you’ll be asked to save the new map as soon as you click OK. Using this option also lets you see your maps in Linked Maps view.
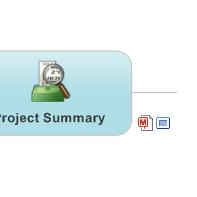
The link to the new map appears as a MindManager icon on the original topic. Click the link icon to open the linked map.
Create hyperlinks from exported topics to original topics:
When your new map is created, this option will create a link back to your original map. You’ll normally want to do this, so you don’t lose the context of the original map. Using this option also lets you use Linked Maps view.
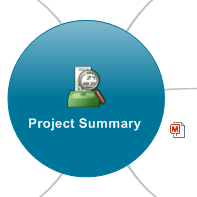
The link to the original map appears as a MindManager icon. Click the link icon to open the original map.
To see your maps in Linked Maps view, click View > Linked Maps.
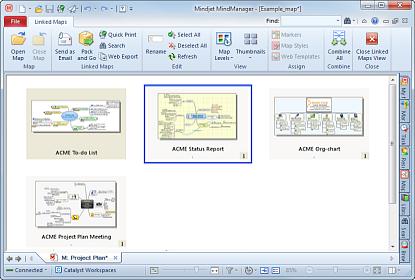
You’ll see a thumbnail view of the maps you just created. This view has commands that allow you to easily apply a consistent style, and send, print, or export your linked maps as a group. And if you change your mind, you can combine your maps back into a single map again.
That’s pretty much all there is to it. The power of this feature is how easy it is to use, once you get used to using it. And it’s definitely one of those features that will make onlookers ask, “How’d you do that?” So give it a try and soon you’ll be able to answer that question with ease!

