
Seasoned MindManager users have done enough digging to become familiar with their favorite features, and determine their preferred way of working with the platform. But even mind mapping experts might not know the full extent of capabilities that MindManager has to offer, particularly when it comes to project and information management. Read on for Part II of our User’s Guide to MindManager for Project Management.
Get caught up with Part I here.
Defining and Validating Requirements
One of the primary reasons projects run into trouble is a failure to gain agreement on expectations from the beginning. MindManager is ideal for creating and validating requirements because its brainstorming tools help you communicate clearly with stakeholders.
Begin by entering basic information about the project, stakeholders and team members. Most importantly, brainstorm on goals, requirements and time frame, and use the project charter as a vehicle to ensure alignment, both with team members and executive sponsors.
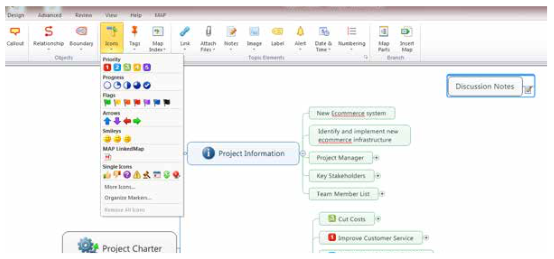
Use MindManager priority markers and other icons to help drive decisions, by drawing attention to items where gaining agreement is essential. Keep notes in a discussion topic for later reference—you can convert the map to a PDF and circulate it as a follow-up to all participants.
Expanding the Project Charter Map
One of the benefits of working in MindManager is its flexibility. You can expand the project charter map in a couple of ways. The first, is by adding topics and sub-topics that you create.
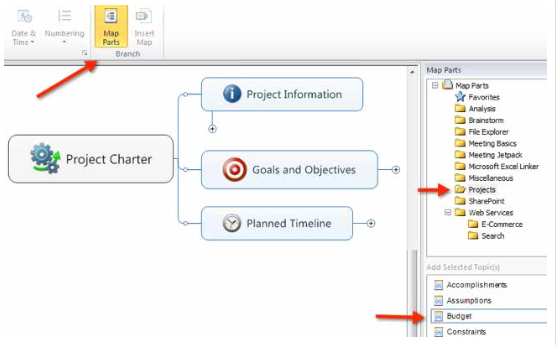
The other is to use a MindManager map part to add pre-built topics to your map. For example, let’s say you want to include getting budget confirmation as part of your requirements definition process. You simply drag the budget map part into your map.
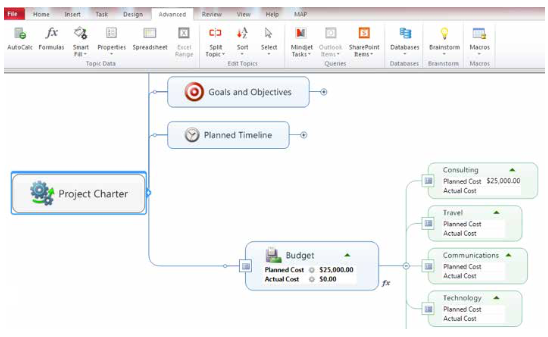
Once you’ve inserted the Budget topic, you can modify the sub-topics and add the numerical information. The Budget Overview will be automatically calculated as you add data to the subtopics. You may find many of the map parts, such as the analysis and brainstorming topics, useful for your project.
Want more? Read Part 1 or download the full User’s Guide here.